
Kubernetes Cluster Monitoring as Non-Admin User
Last updated - 25 July, 2025
When you add your Kubernetes cluster to monitoring, dynamic groups are used to group the cluster resources. For more information, see Adding a Kubernetes Cluster to Monitoring.
Non-admin users can add Kubernetes clusters to monitoring using API keys with more granular access. These API keys should have access to at least one resource group, which provides the necessary permissions to configure monitoring for Kubernetes clusters. This significantly improves access control, as the dynamic groups are now linked to the resource groups that the API keys can access, based on view permissions.
Before non-admin users can add Kubernetes clusters to monitoring, several prerequisites need to be set up:
Enabling non-admin users to add a Kubernetes cluster to monitoring
- Ensure that different device groups are created for non-admin users. For more information, see Adding Resource Groups.
- Navigate to Settings > User Access > User and Roles.
- Select the Roles tab.
- Select the required role group and select the
 Manage icon.
 - In the Permissions tab, assign the required access to the Kubernetes cluster static groups.
Note: You can create multiple users with specific roles from the Manage Role dialog box.
When the required permissions are provided, the non-admin users can add and monitor the Kubernetes clusters within the static groups.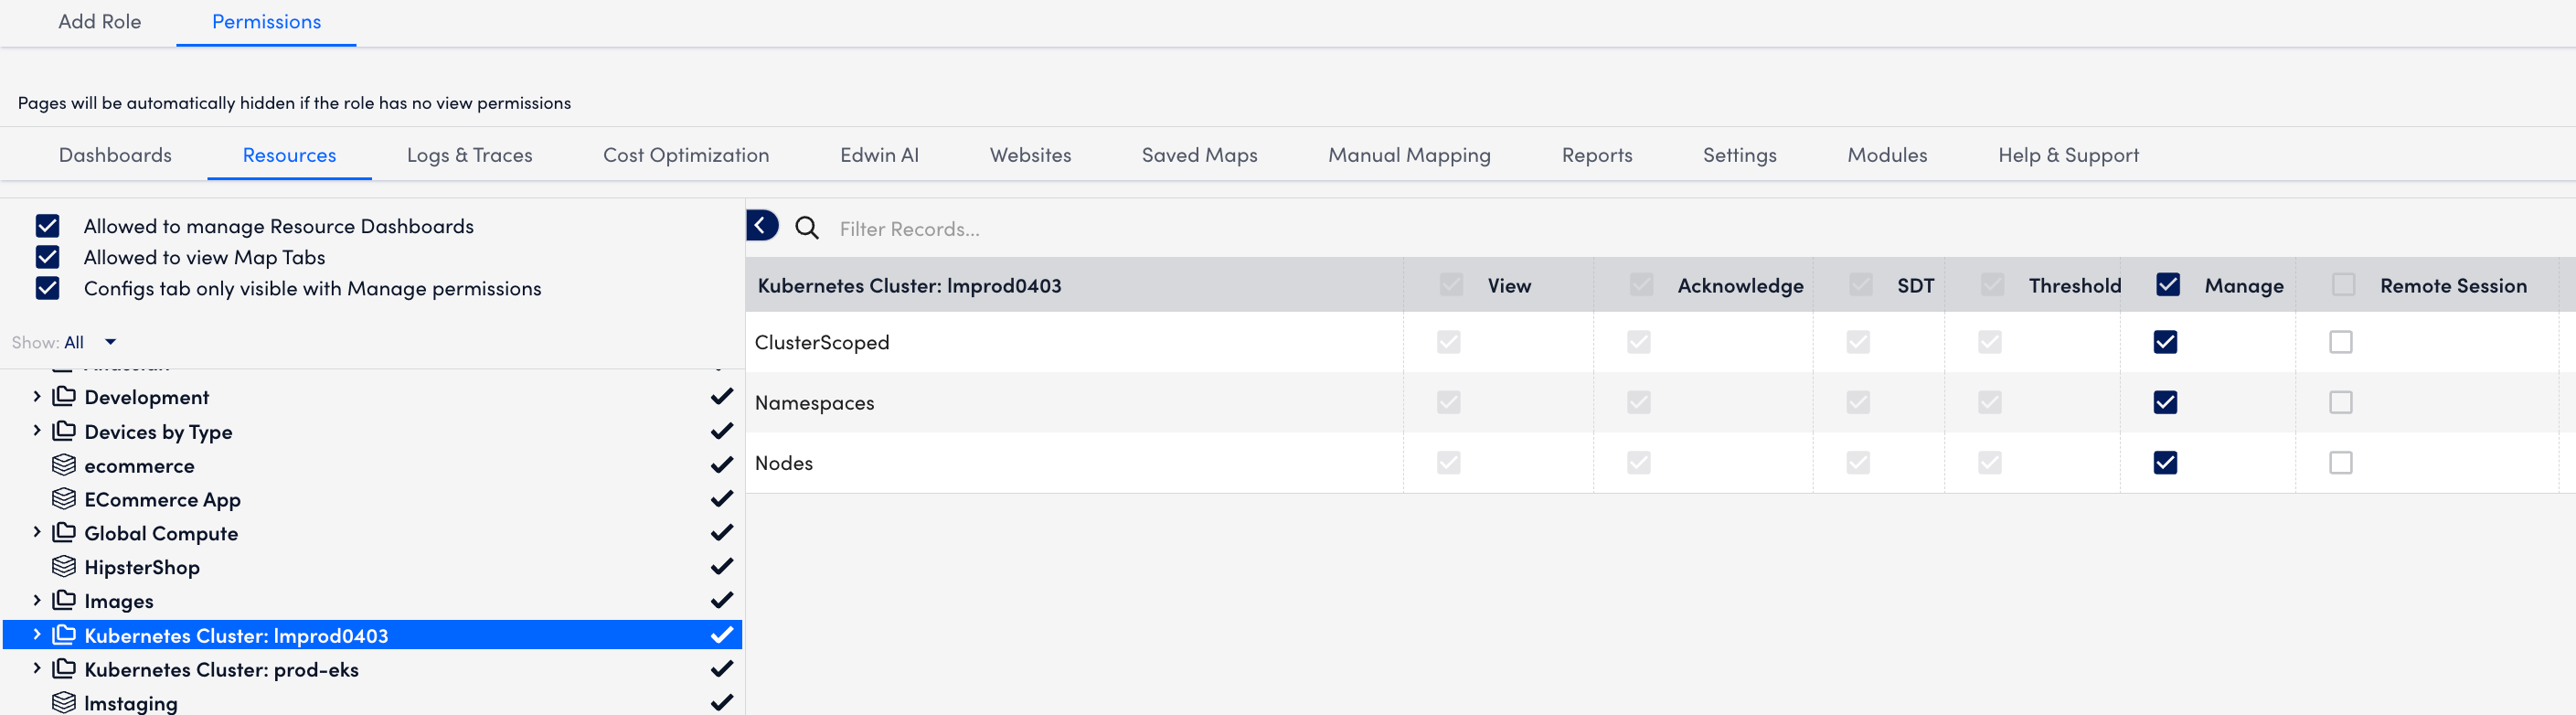
- To create the required dashboard groups, in the top left of the Dashboards page, select the Add icon
 > Add dashboard group. Enter the required details. For more information, see Adding Dashboard Groups.
 - To create the required collector groups, navigate to Settings > Collectors.
- Under the Collectors tab, select the Add Collector Options dropdown. Enter the required details. For more information, see Adding Collector Groups.
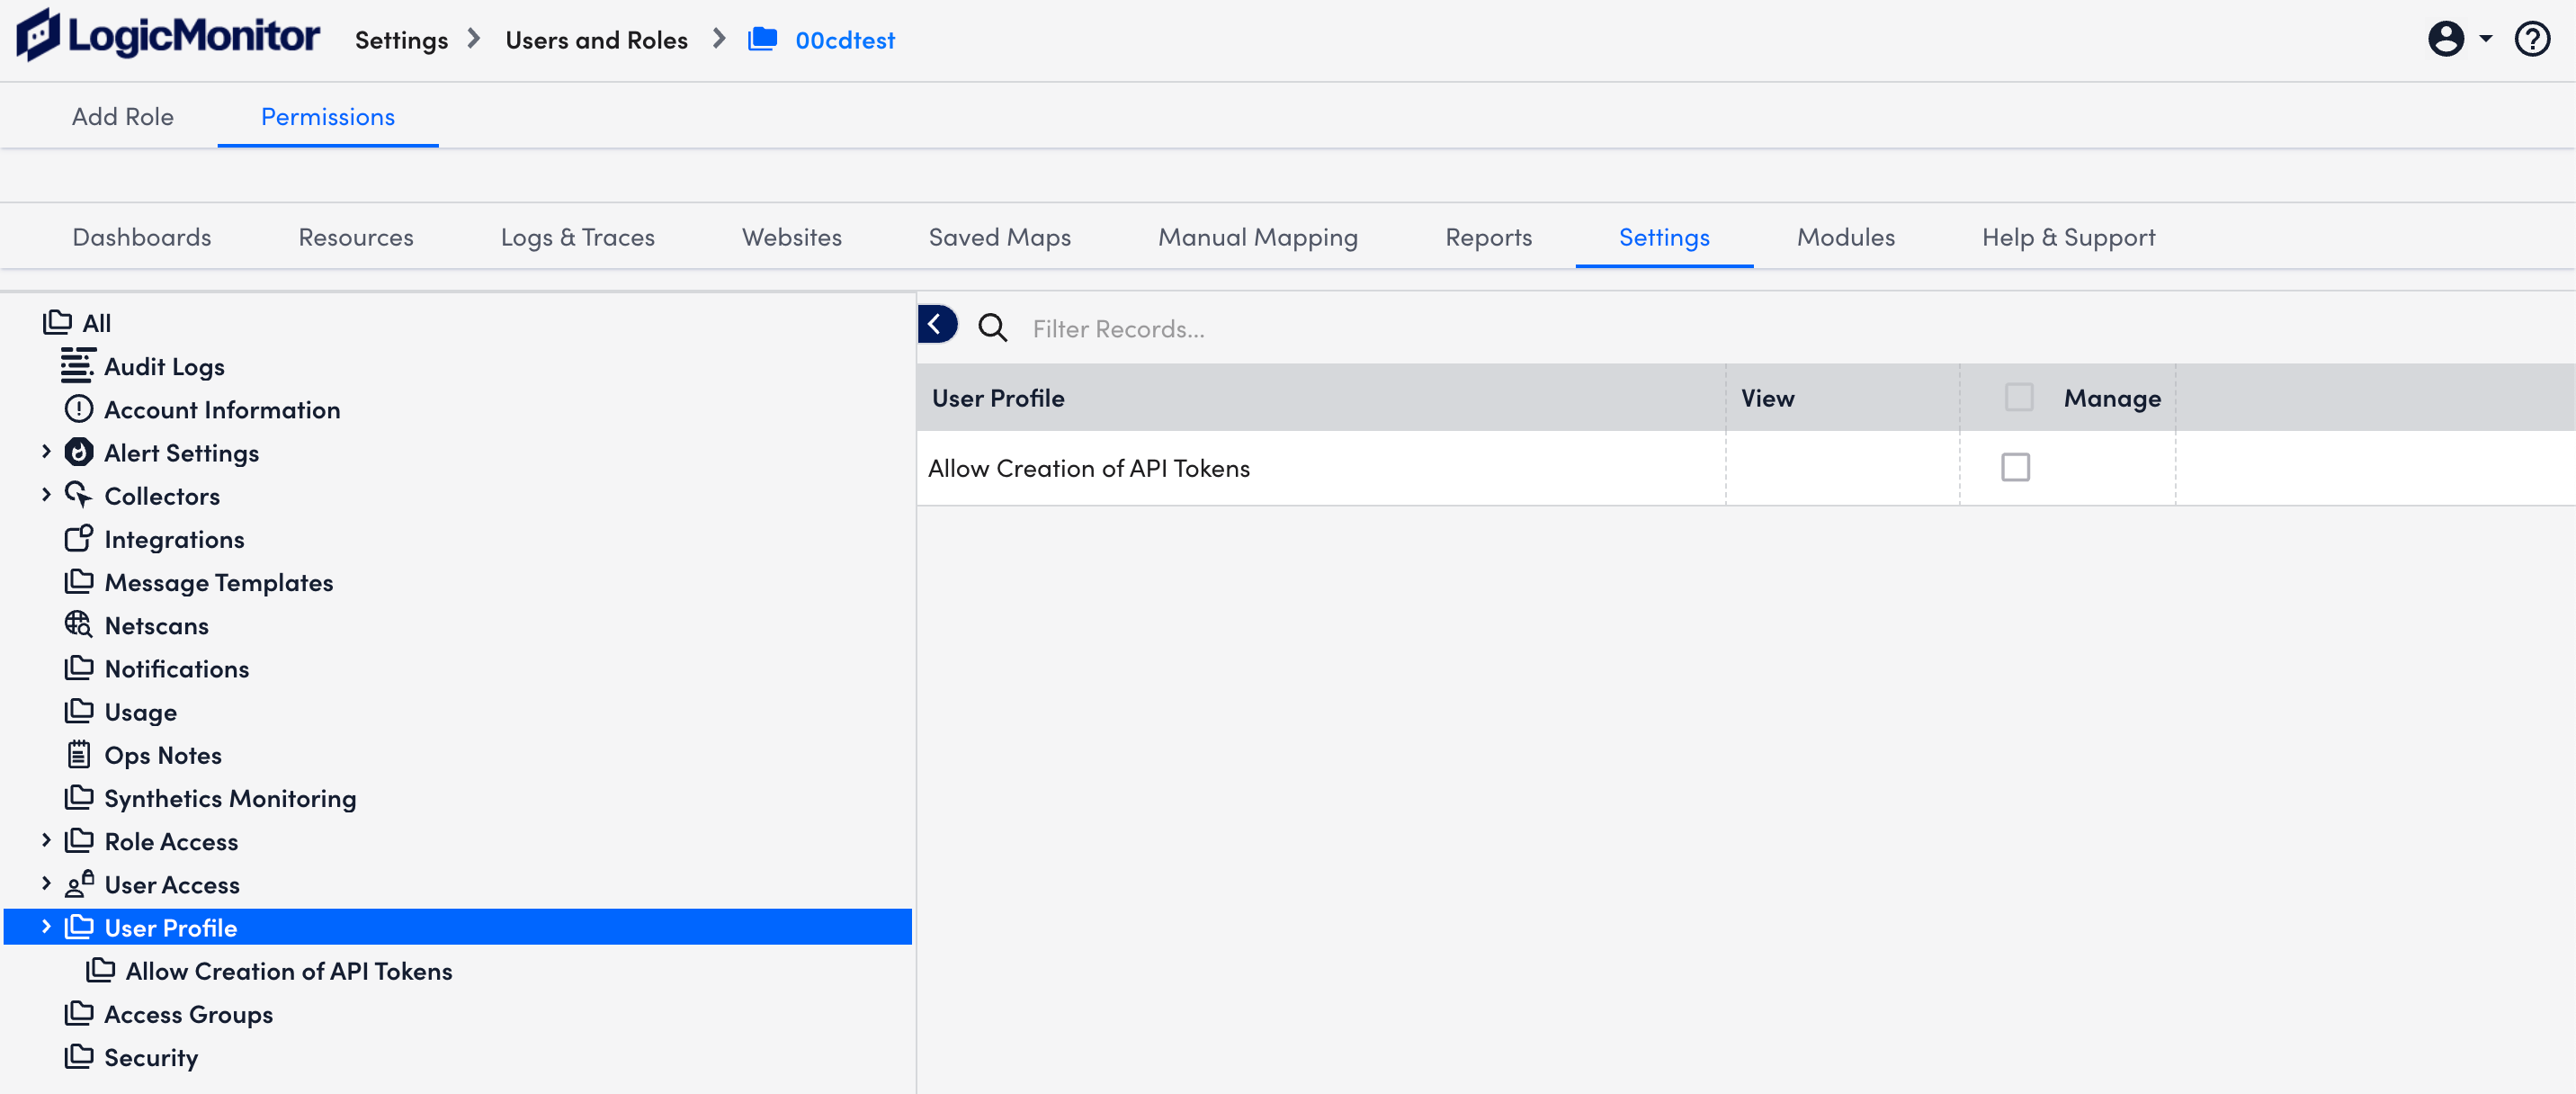
- Select the User Profile in the Permissions setting and grant non-admin users access to create API tokens and manage their profiles.
After a resource group is allocated, non-admin users can add Kubernetes clusters into monitoring.
Adding a Kubernetes Cluster into Monitoring as a Non-Admin User
- Navigate to Resource Tree > Resources.
- Select the allocated resource group to add to the cluster.
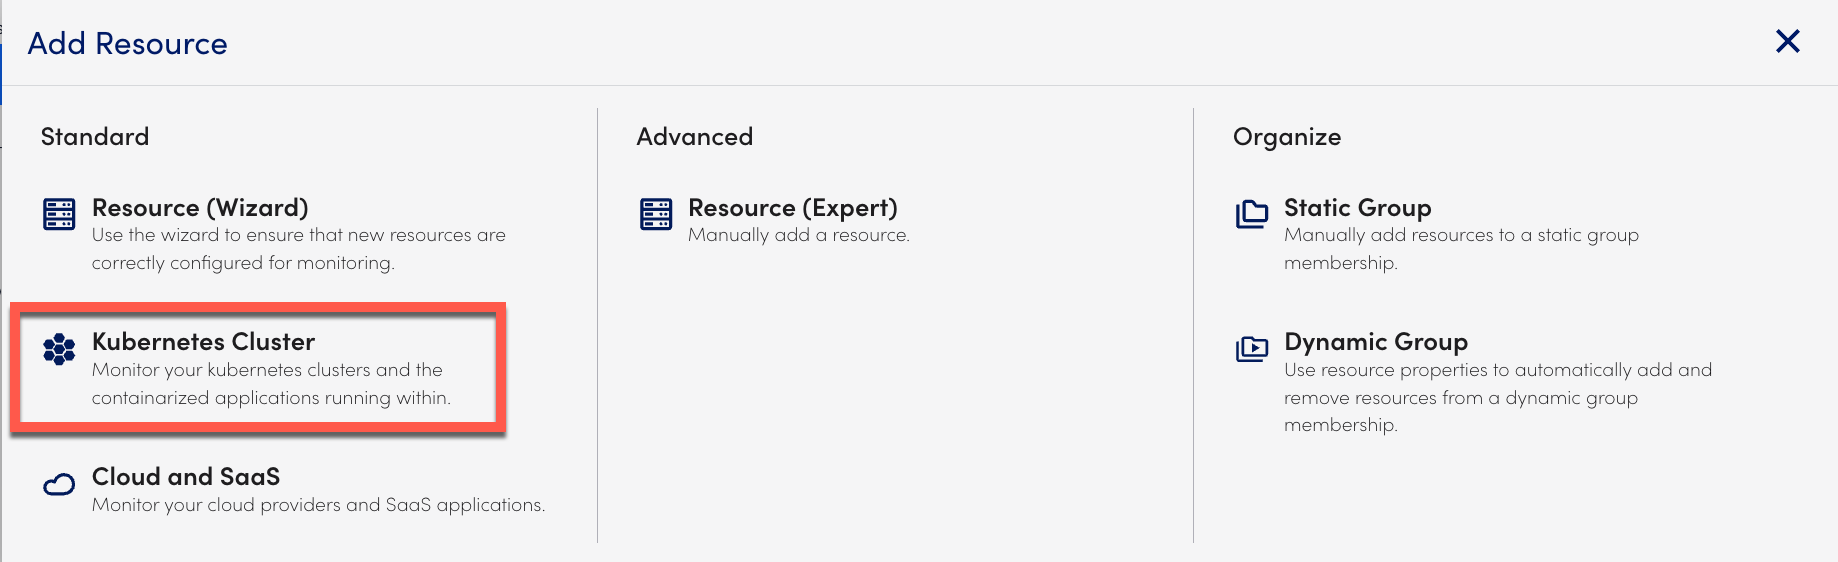
- Select the Add icon and select Kubernetes Cluster.
- On the Add Kubernetes Cluster page, add the following information:
- In the Cluster Name field, enter the cluster name.
- In the API token field, select the allocated resource group’s API token and Save.
The other API Token field information populates automatically. - In the Resource Group field, select the allocated resource group name
- In the Collector Group and Dashboard Group fields, select the allocated Resource Group.
- Select Next.
- In the Install Instruction section, select the Argus tab.
- Select the
resourceGroupIDparameter and replace the default value with thesystem.deviceGroupIdproperty value of the allocated resource group. - Select Verify Connection. When the connection is successful, your cluster is added.
